Hello bloggers out there! Welcome to my first ever blog! I’d like to start off by saying, bare with me, the information will only improve as the blogs keep rolling in.
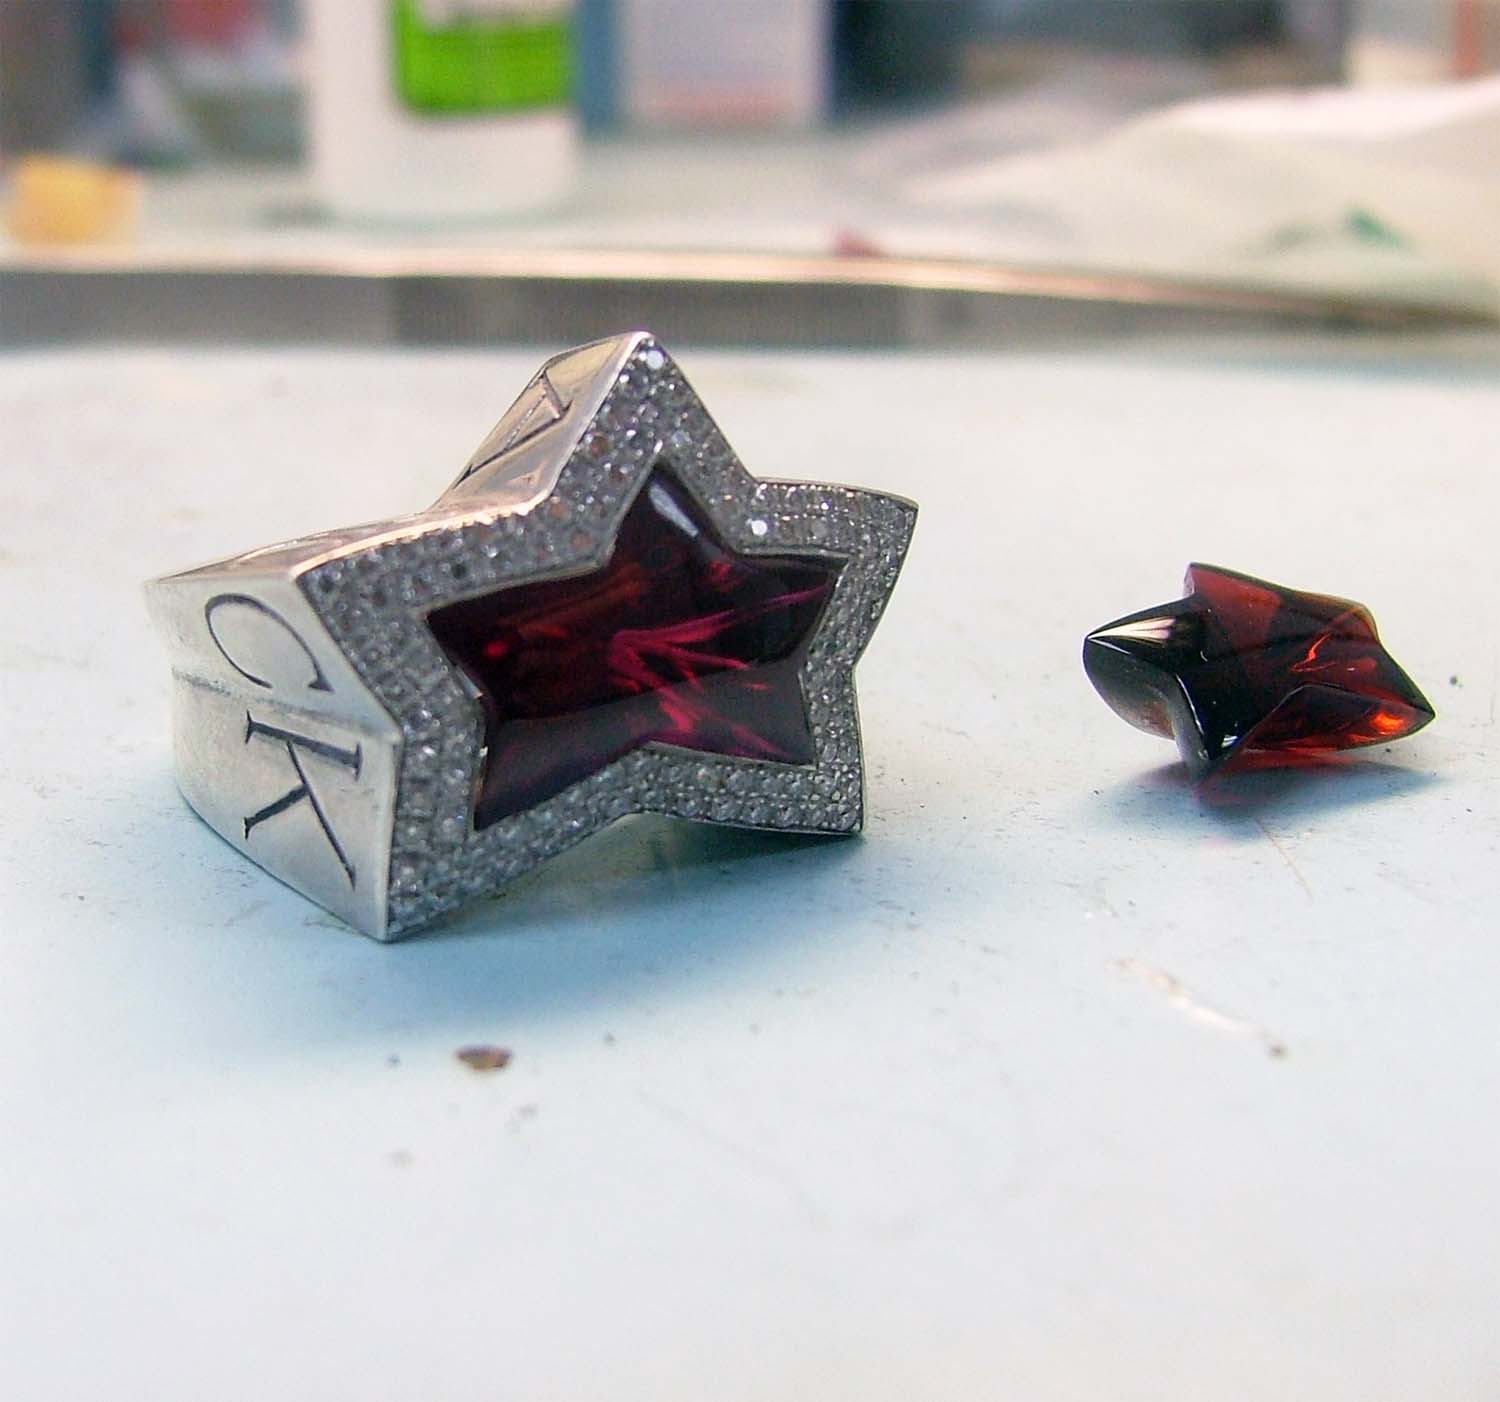
As promised, I received a very custom style job that needed a matching style, star cut, cabochoned on top with each star groove on the pavillion to be cabochon as well so when you look at it from the top, you’ll get this star outline look as well (it’s hard to explain until you see some of the photos which is laid out over this blog).
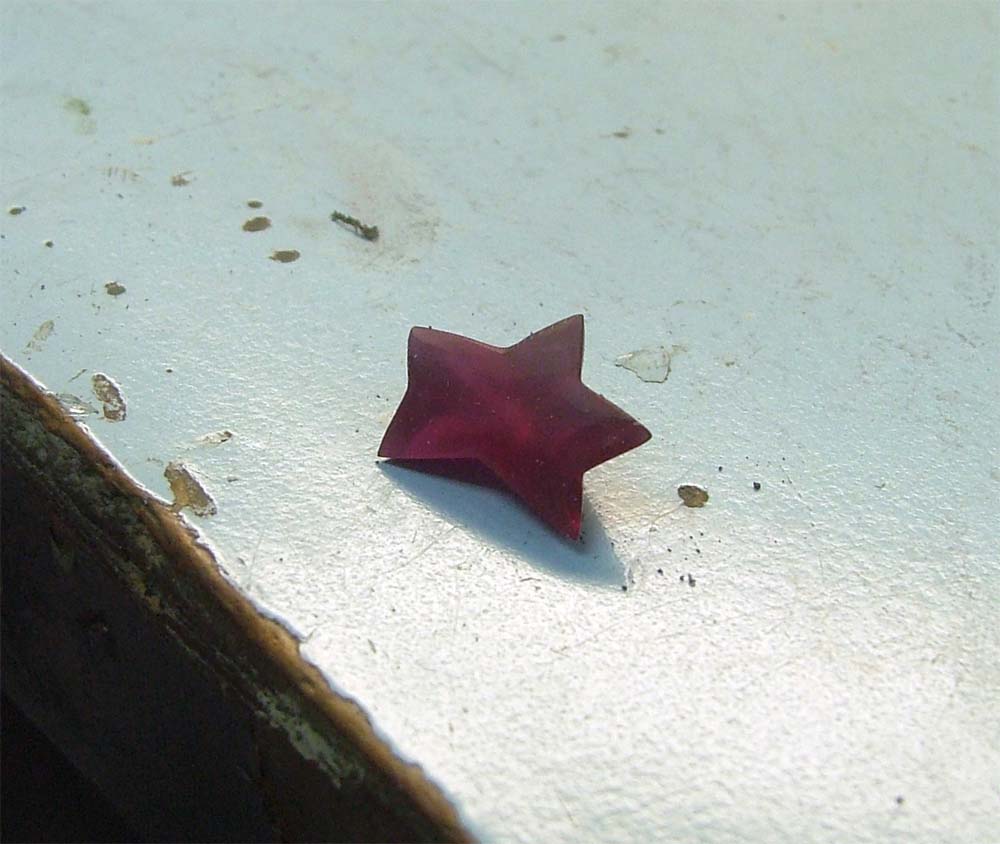
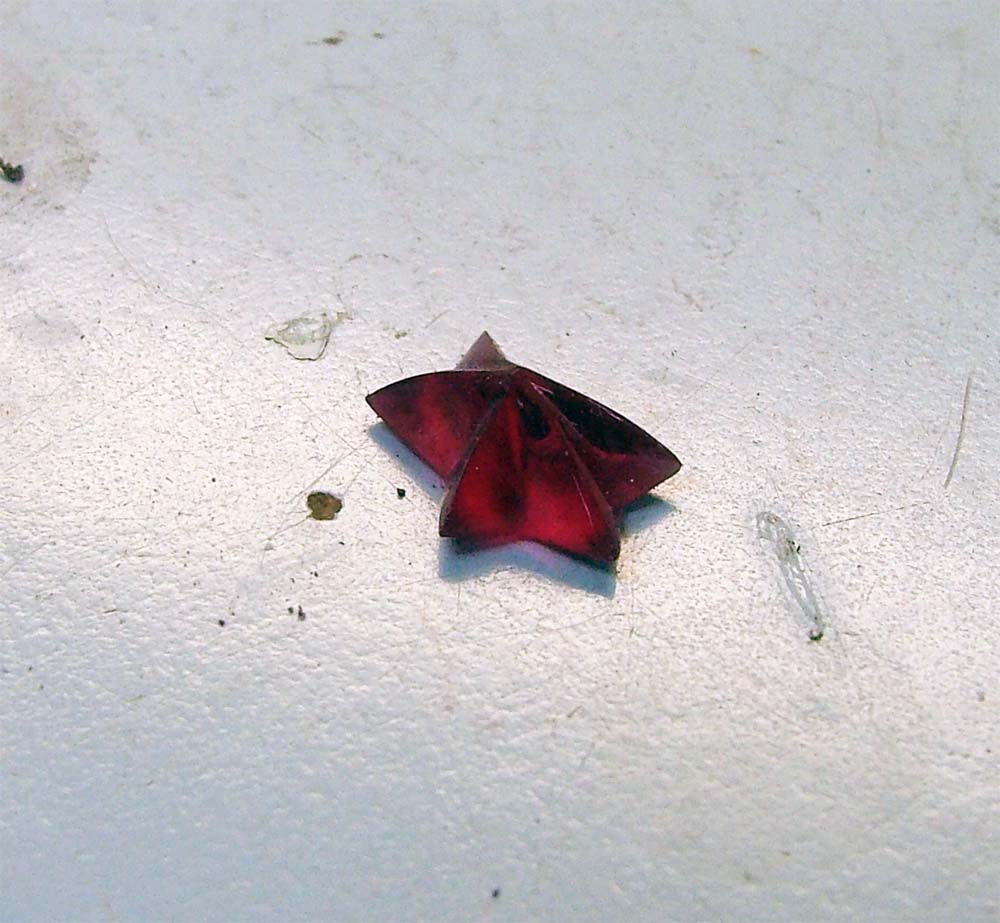
The customer wanted me to supply and cut synthetic ruby matching the sample. I grabbed a small piece of synthetic ruby rough that matched the color they were looking for. I had the broken sample to go by as a helping hand so life would be easier on me. I got a piece of non transparent tape, stuck it on top of the white gold ring and I started to shave out the outline of the star with a small file in order to get the correct size of the synthetic ruby. I get on my lap machine and I start to shape this piece of rough until I get close enough to the outlined area of the tape. I quickly moved to my bench and started to use my various drill bits to get that angled groove that the sample has.
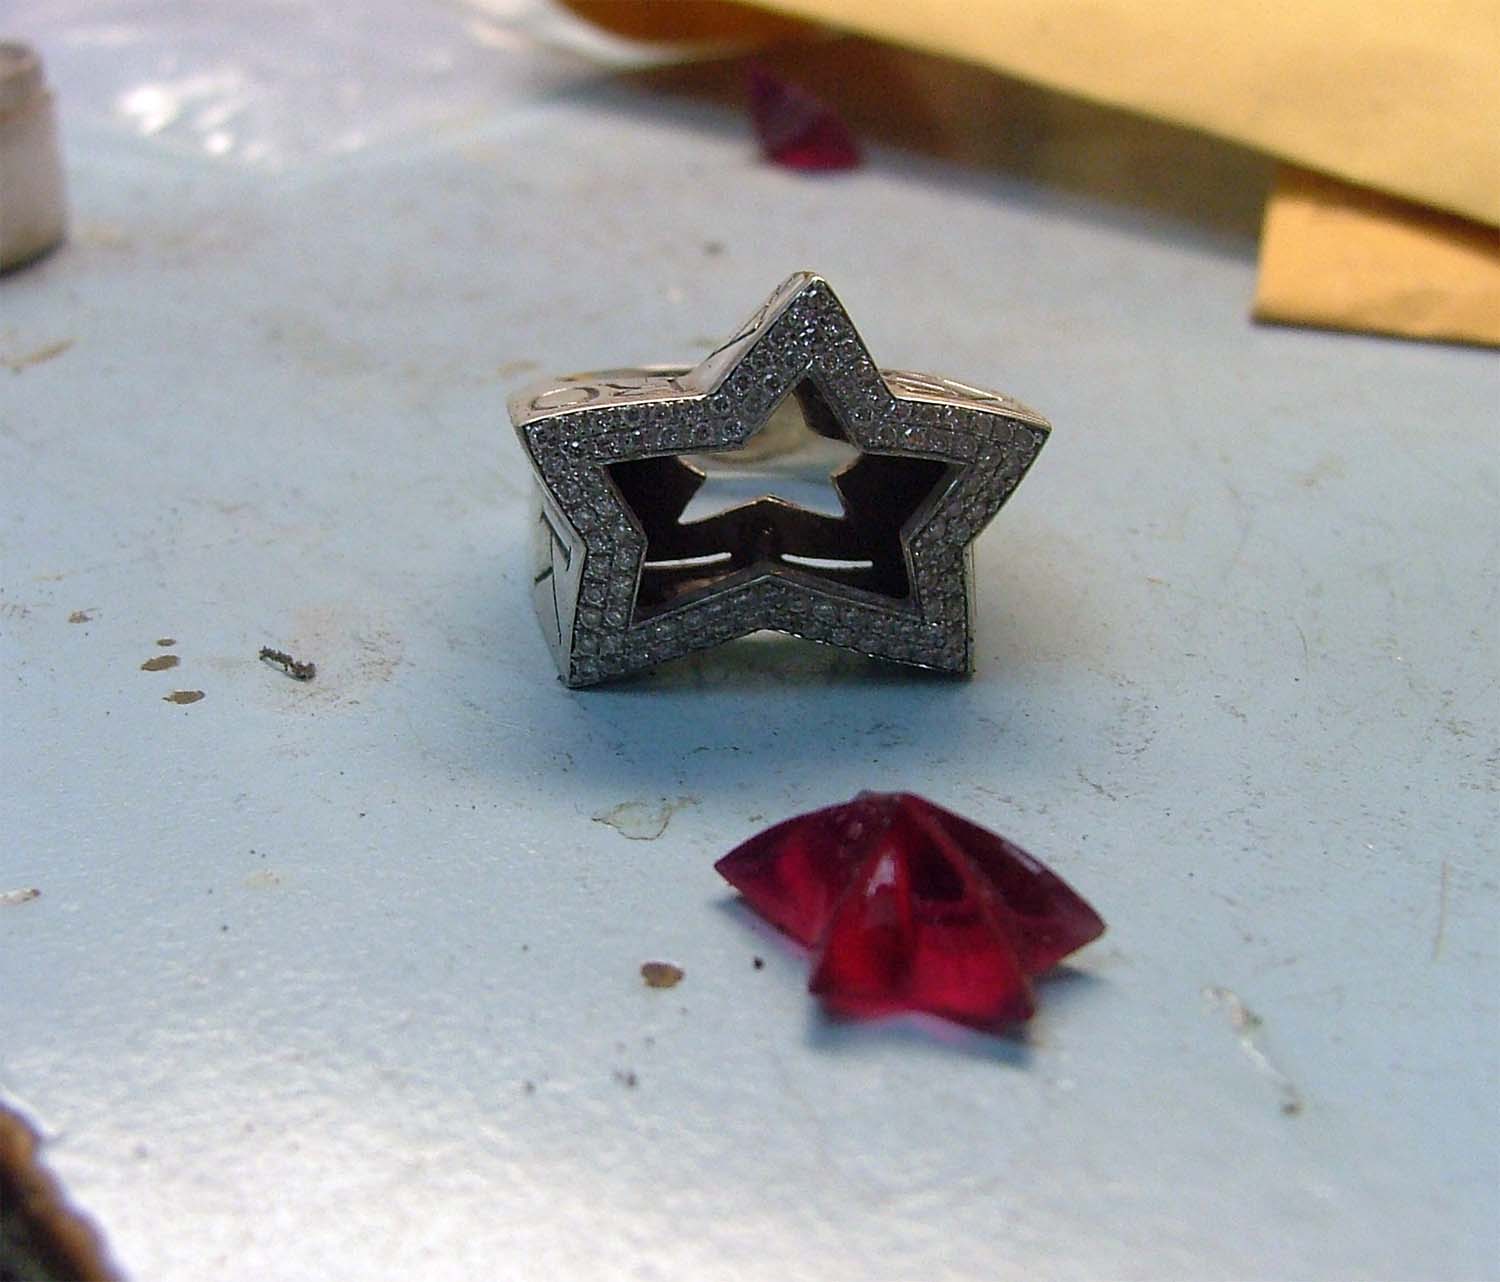
After countless hours of getting it as close as possible to a point where I have to start using my cabochon machine to get that flush, slightly domed look I’ve been aiming for with a transparent view from top. I’ve decided to take a break from this job for a day or so and work on pending work to meet deadlines. I hope you’ve been enjoy some pictures of how I’ve started this job and where I stand so far.
It has been quite the journey with this job. The stress levels go through the roof with technical and labor intensive work. You ask why? If I break it, all that hard work, time and effort I put into it goes to waste and the second piece starts to come out of your pocket. So the pressure is on to finish this job with no problems. Here’s a bit of synthetic ruby fact: first synthetic rubies were created by fusing potash alum at a high temperature with a little chromium as a pigment back in the late 1830’s by some guy named Gaudin.. (that was for all you statistical and history buffs out there!)
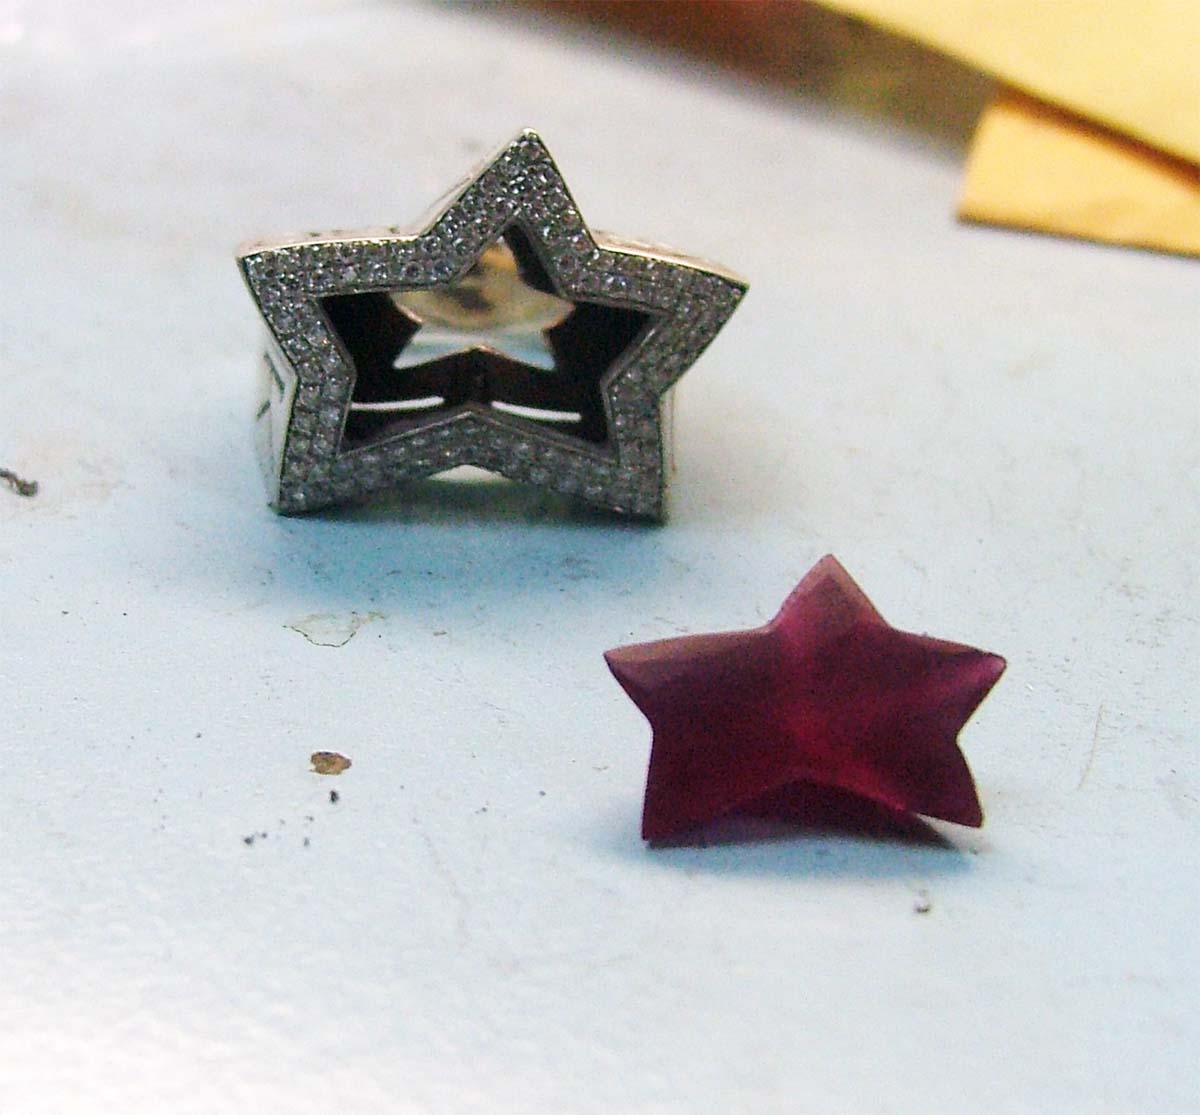
It’s been a few days since I’ve touched this job but I’ve decided to pick up where I started with it. I started with the top of this synthetic ruby and I started to add that diamond powder to that lap wheel to give it that shine and you start to see it open up. Translucent is what we are aiming for. The stone itself is pretty opex in rough form, but what I’ve done is open a window on top of the table and the translucent look is starting to come to life. So far so good. Now, I need to add a slight dome. How to accomplish this? With both thumbs and index fingers, slightly rock the stone back and forth. You need a bit a rhythm to accomplish such moves. I suggest you pick an instrument or a metronome and see if you can keep that ‘four four’ time signature beat going. This also requires a bit of feel as well in order to get into that groove. Plus, you need to be a pretty ‘hands on’ guy. Anyway, I grabbed my ring, and I let the synthetic ruby just sit in the star shaped mounting. I gave it a sideway glance and you can see it slightly domed, buffed and polished. The window I opened looks good. All I need to do now is to open ten widows that lead all to one point. Sounds a bit easy? Think of it as if I’m doing surgery on a starfish and I need to be as delicate while opening windows on each side to complete this job. I change out the wheel on the lap machine, going for a rounded disk wheel, leaving me with the difficult task of trying to open up the cleavage area of each side of the bottom of this synthetic ruby. I go with my drills, change out the drill bits, mickey mouse a certain drill bit with some polishing cloth and the windows just opened up. I’ve left out technical details so I can still remain the ‘go-to’ guy here for all gem cutting and inlay lapidary needs. Enjoy the photos and hopefully I explained myself pretty well. Until next time!

sako
Latest posts by sako (see all)
- Fresh Water Elephant - March 5, 2014
- Spessartite Delight - August 15, 2013
- Orange shaped Triangle - January 3, 2013
