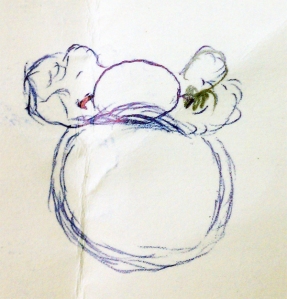
I’ve been lagging as of late from my last post so I do apologize. But behind the scenes I’ve been compiling a list of projects I can blog about so I can bang them out on a weekly basis. On that note, I had a friend drop by my office the other day with a crazy idea. She wanted me to supply a pearl that has been unwrapped and make a silver ring out of it. I was like ‘what the hell are you talking about???’ So she goes into her purse and pulls out this drawing of her idea.
After looking at this picture for like a minute with the biggest puzzled look on my face, I asked her to explain herself. She told me she wanted a pearl ‘candy wrapped’. Still didn’t make sense. I said, ‘paint the picture for me’. She went on to tell me that ‘you know how when you open an oyster up and a pearl sits in the middle? Well, what if you can unwrap a candy wrapper and it presents to you a pearl like an oyster does?’ Really, hippie woman? I asked her to draw it for me right there on the spot. Picasso would love this abstract piece of art.
After looking at this, I told her that I’ll work on something. I get the concept but to put it into 3 dimensions without making it look bad was the part that I was having a hard time with. I pulled out an oval shaped pearl, went downstairs to the liquor store and bought myself a butterscotch candy. I unwrapped it, removed the candy from the wrapper, and sent it straight into my mouth. I put the pearl into the candy wrapper and twisted it shut. The unveiling I was about to perform was about to put the picture into reality. I unwrapped the candy wrapper and that pearl looked right back at me. I’ve finally figured out how to CAD design this ring and complete it.
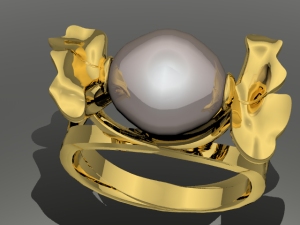
It looks cool right? This is a top view of the pearl ring.
I gave it a split shank look with a stem like support on the edge of the wrappers.
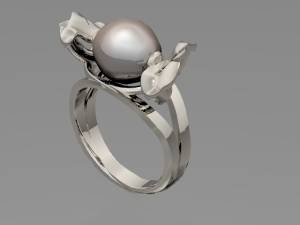
Here’s the silver/white gold look. Night and day difference from the my friends drawing.
Here you got the yellow, white and rose gold looks.
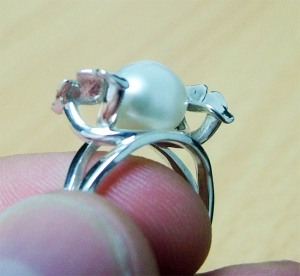
I sent the CAD file to my solid scape machine and started to grow the wax. Are you wondering how the pearl is going to sit? I’m glad you asked as always. I drilled two holes where pins on both sides of the mounting holds the pearl in. After wax is done growing, I send it for silver casting. I receive it back from casting and set the stone polish and finish the ring. I present to you the ‘Candy Wrapped Pearl”…
Here’s a top view. My cellphone camera takes better pictures then my 8 year old camera. Horrible, I know.
Here’s a more clear image from a top view. It looks great!
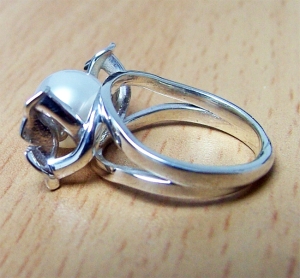
Here’s another angle.
Here’s another side view shot of the ‘Candy wrapper pearl’ ring.
Here’s the bottom of the ring. Keep in mind my friend was on a budget and wanted something simple and this came out to be on budget and for everyday use. It’s an awesome ring for any outing.
I delivered the ring to my friend and she absolutely loved the way it came out. Unfortunately, I couldn’t take a picture of the excitement on her face.
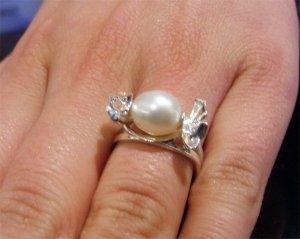
But she did allow me to take a photo of her hand with the ring on it.
Keep in mind, me being a gem cutter, I can cut you any stone to fit into the candy wrapped design. Whether it be rose cut all around a black onyx or some nice dark Amethyst from Uruguay. Name it and I can sculpt away. Yes, I do special orders if you haven’t noticed. I’ll be featuring some more later on.
Next week, I’ll be featuring some crazy Turquoise carving I did for a customer of mine. Till next time…
Actually, I wanted to give a nice shout out to the US Women’s National team because what they pulled off in the 122min into extra time against Brazil was something out of Hollywood. I was in awe. Good luck to them as they try to capture a 3rd World Cup against Japan. Ok, now I’m done. Cheers!
sako
Latest posts by sako (see all)
- Fresh Water Elephant - March 5, 2014
- Spessartite Delight - August 15, 2013
- Orange shaped Triangle - January 3, 2013







{ 5 comments… read them below or add one }
Are you taking orders? I really love this design 🙂
She was extremely excited. I use the Matrix CAD program to build my jewelry when needed. I also enjoy hand made as well. But some things need a CAD touch to it. I’m glad you enjoyed it. Subscribe to my blog at cicadajewelrydesign.wordpress.com so you can follow every step I right about. Thanks once again Suzanne!
It’s really good to see the process from idea to delivery, thank you. I can understand how excited your friend must have been when she saw the ring. Can I ask what CAD software you used?
Thanks for the kind words.
This is a wonderful example of imagination come to life. Great job!