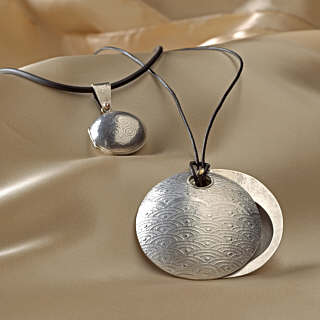
How to Make Your Own Locket
Before photography, lockets were decorated with miniature, handpainted portraits -- a luxury few could afford. The advent of affordable photographic miniatures propelled the locket to the forefront of jewelry fashion during the sentimental Victorian era. Between 1890 and 1920, ornately crafted lockets were suspended from bracelets, necklaces, brooches, belts, and chatelaines. Ladies of fashion were not seen without one, and men wore them on their watch chains. During World War I, many soldiers wore lockets into battle as a reminder of loved ones at home. Lockets have since fallen out of fashion, and distinctive lockets are hard to find. With this project, you no longer have to rely on a fashion trend to have a high-quality locket -- you can create your own. You will learn how to make the traditional hinged locket and an easier slide locket.
11 Minute Read

Before photography, lockets were decorated with miniature, handpainted portraits — a luxury few could afford. The advent of affordable photographic miniatures propelled the locket to the forefront of jewelry fashion during the sentimental Victorian era. Between 1890 and 1920, ornately crafted lockets were suspended from bracelets, necklaces, brooches, belts, and chatelaines. Ladies of fashion were not seen without one, and men wore them on their watch chains. During World War I, many soldiers wore lockets into battle as a reminder of loved ones at home.
Lockets have since fallen out of fashion, and distinctive lockets are hard to find. With this project, you no longer have to rely on a fashion trend to have a high-quality locket — you can create your own. You will learn how to make the traditional hinged locket and an easier slide locket.

Materials You'll Need To Make Your Own Locket
Sterling silver sheet:
Sterling silver wire:
- 18-gauge (1.0mm), round, half-hard, 3 in. (76mm)
- 12-gauge (2.1mm), round, half-hard, 2 in. (51mm) (no good listing right now)
Sterling silver tubing:
- 1.0mm ID, 1 in. (25.5mm)
- 9.5mm ID, heavy-walled, 3 in. (76mm)
18k or 14k gold wire (optional):
- 18-gauge (1.0mm), round, half-hard, 3 in. (76mm)
- 12-gauge (2.1mm), round, half-hard, 2 in. (51mm)
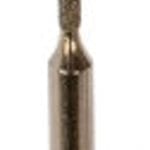
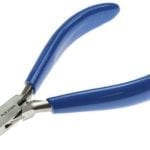
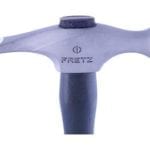
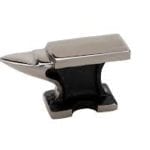
Tools & Supplies You'll Need To Make Your Own Locket
Buy List


The Traditional Hinged Locket
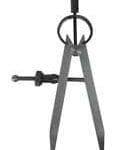
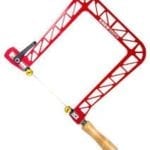
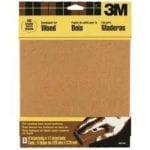
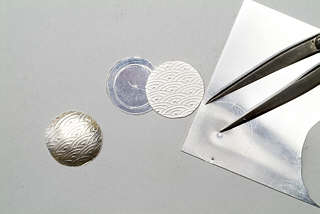
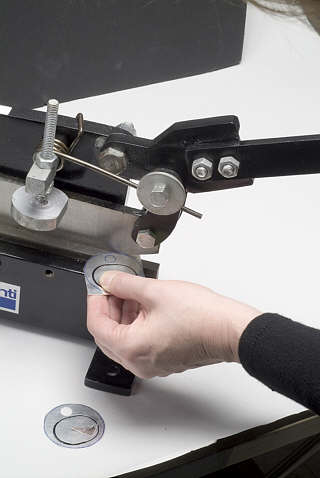
| Cut out the disks. Use dividers to mark two 25mm (1-in.)-diameter disks on 20-gauge (0.8mm) sterling silver. Repeat on 26-gauge (0.4mm) sterling silver. Use a disk cutter or a jeweler's saw to cut out the disks. | |
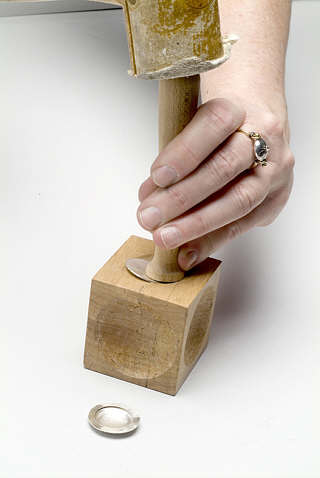
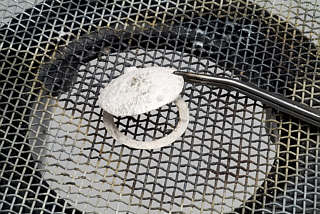
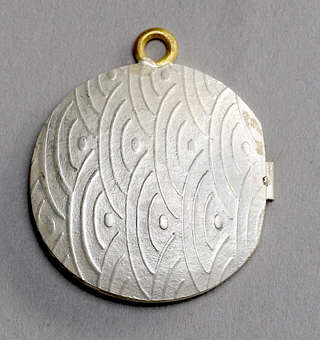
Dome the two 20-gauge (0.8mm) disks. Start with a shallow hollow on a wooden dapping block. Move around the edges of the disk with the wooden dapping punch, spiraling toward the center of the disk. Continue to dome the disks by moving to deeper hollows on the wooden dapping block. A wooden dapping block is great to use with textured metal, since it will not mar the texture. The patterns on this sterling silver were created using roll-printing. | |
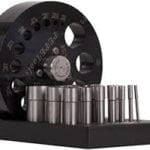
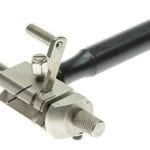
| Use 220-grit sandpaper on a flat surface to sand the edges of the domed disks. Use figure 8 motions with a steady pressure to keep the domed disk level. Make the bearing plates. Set your dividers to 3mm (1/8 in.) to scribe a border on each of the 26-gauge (0.4mm) flat disks. Use a disk cutter or a jeweler's saw to remove the interior of each flat disk. Smooth the interior edge of each with sandpaper. These flat disks, called "bearing plates," will reinforce the hinge and provide an interior lip to hold a photo in place. Make the hinge knuckles. Use a tube-cutting jig to cut three 3mm (1/8 in.) pieces of 1.0mm inside-diameter (ID) tubing. Hinge knuckles work best in odd numbers and must be flush against each other when placed end to end. | |
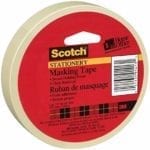
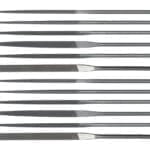
| Make the two sides of the locket case. Sweat medium solder onto one side of each bearing plate. Place a bearing plate, solder side up, on a tripod stand. Place a dome on top of the bearing plate. Solder the pieces, heating evenly from below and above using a large, soft flame. Repeat with the other pair. These pieces are the two sides of the locket case. Prepare the locket case for a hinge. Use masking tape to tape the locket-case pieces together. Using the edge of a square or triangular needle file, start an 8-9mm ( 5/16 -23/64-in.) long groove where the two locket-case pieces meet. Once the groove is established, switch to a 1.5mm round needle file or a diamond-core drill to make the groove even. Make the groove only wide and long enough to fit the hinge knuckles. Remove the masking tape once the groove is the correct size and shape. Carefully paint the areas you do not want to solder with correction fluid, including the bearing plates. The benefit of correction fluid as an anti-flux over more traditional ocher is that correction fluid does not dissolve with the application of flux, preventing contamination. Allow the anti-flux to dry completely, and then clamp the locket-case pieces together with binding wire. Make sure the groove for the hinge is lined up and straight. | |
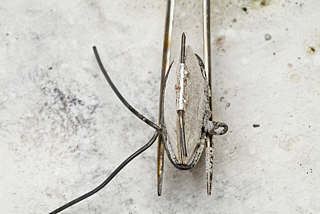
| Solder the hinge in place. Use a third hand to hold the locket case steady on your soldering pad, hinge side up. Flux all the metal parts and lay the hinge knuckles in place. The hinge knuckles must be straight, level, and tightly fitted against each other to yield a good working hinge. Thread a piece of iron binding wire inside the knuckles to help keep them straight. The wire acts as a slight heat sink and may also block solder from flowing inside the hinge. Lightly fan the assembly with a soft flame to speed the drying of the flux. Once the flux has dried to a white crust, check to make sure all of the hinge knuckles are solidly in the groove. Place pallions of medium solder so that they touch both the locket case and the knuckles. The top and bottom knuckles will be soldered to the back of the locket case, while the center knuckle will be soldered to the front. Heat the entire assembly with a large, soft flame. When the flux goes clear, the piece is reaching the temperature for the solder to flow. Focus the heat on the knuckles on one side of the locket until the solder flows, then concentrate the heat on the other side of the locket to solder the other knuckle. Quench the locket in water, and remove the binding wire. Pry the locket case apart, and test the strength of your knuckle joins with a fingernail. If any of the knuckles are not securely soldered, repeat step 5 until all the knuckles are securely attached. | |
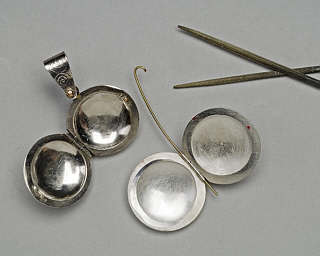
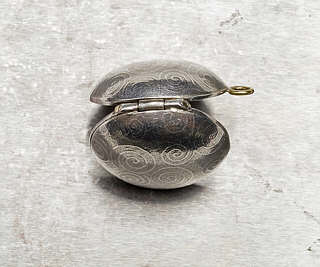
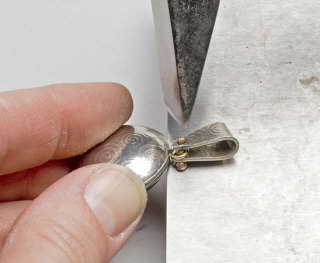
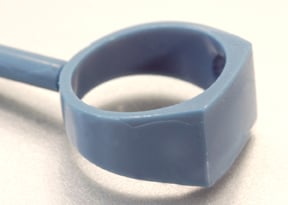
| Once you have successfully attached the hinge to the locket case, run a wire through the hinge to test the alignment of your locket. A finished locket is pictured to show the orientation of the hinge to where the bail loop and friction-clasp pin will need to be installed. File and sand the edges of the closed locket smooth and even. | |
| Install a bail loop. Mark a point on the top center of the back piece of the locket case. Separate the locket case, and set the front piece aside. At the mark on the top of the back piece, file a small groove perpendicular to the back piece where the bail loop will go. Place the back piece, flat side down, on your soldering pad. Place a 3mm ID jump ring into the groove, and solder with easy solder. Quench, pickle, and rinse it. Install a friction-clasp pin. On the bearing plate of the back piece, directly opposite the hinge, mark a point halfway between the inside edge of the bearing plate and the outer edge. At that point, drill a 1.0mm hole through the bearing plate only. Sweat a small bit of easy solder onto the end of 18-gauge (1.0mm) sterling silver wire. Cut off a 5mm (3/16-in.) piece. Use flatnose pliers to force the soldered end into the hole until it touches the inside of the dome. Hold the back piece in cross-locking tweezers. Flux and heat it with a large, soft flame until the solder on the wire flows. Quench the back piece, check your solder joins for security, and pickle. | |
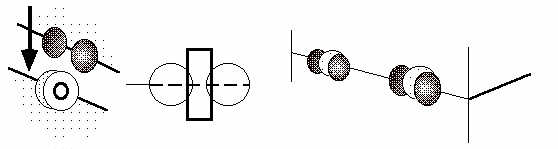
| Install the hinge pin. The hinge pin will last longer if it is straight and made from a tougher metal than silver. Brass, nickel, and 14k white gold wire are optional material choices that all work well as hinge pins. The hinge pin should be as tight in the hinge as possible, as wear will loosen the hinge. File the ends of the outer knuckles to follow the contour of the locket. Clamp the hinge pin in a bench vise, and use a cross-peen hammer to flare one end. Put the locket-case pieces together, and thread the hinge pin through the hinge. If the hinge pin is tight enough, you might need pliers to pull the pin completely through. Use wire cutters to clip off extra hinge-pin wire. To set the hinge pin, hold the flared end of the hinge pin against a bench anvil, and tap the other end with the cross-peen hammer. Sand off any stray tool marks. | |
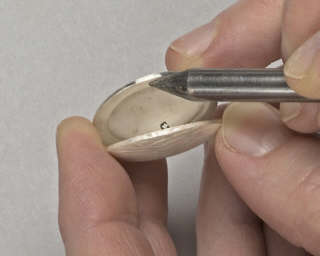
| Fit the friction-clasp pin. Once the hinge pin is set, close the locket and mark where the friction pin hits the bearing plate of the front locket-case piece. Use a 1mm ball bur to make a divot at that point, and test-close the locket to make sure the divot is in the correct spot. Drill a hole, through the bearing plate only, with a 0.9mm drill bit. Trim the friction-clasp pin. Use needle files to round the pin's top and shape it to have a notch on one side. Continue to test the pin in the hole during this process until the locket closes with a snap. Complete the finishing. Polish or patinate the locket as desired. Install a 12-gauge (2.1mm) jump ring as a bail, or, to take this locket to the next level by making your own bail, see "Fabricate a Cold-Connection Bail" below. |
The Slide Locket
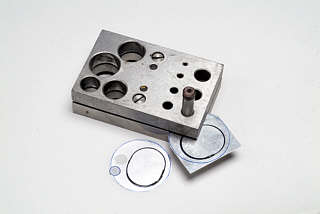
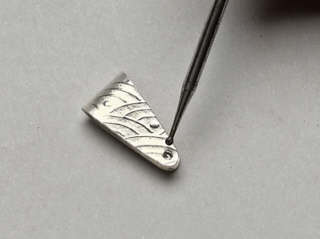
| Cut out the disks. Cut out two 20-gauge (0.8mm) disks as in step 1 of the traditional locket, but make each disk 50mm (2 in.) in diameter. Repeat steps 2 and 3 of the traditional locket. It will require more effort to dome the larger- diameter disks evenly. Make the bearing plates. Use dividers to mark two 50mm (2-in.) -diameter disks on 26-gauge (0.4mm) sterling silver. Use a drafting template to mark the picture frame hole on each bearing plate. Using dividers to mark your measurements will help to keep the placement of the holes identical. As an alternative to sawing, use a bench shear to cut out the bearing plates. | |
| Use a disk cutter to cut a 9mm hole at the top of both plates. Use double-stick tape to stick the two plates together. Drill a hole for your saw blade so you can saw out the center shape. Since the two bearing plates are taped together, you will be sawing through both at once. File and sand the inside edges with the two plates taped together. Make the two sides of the locket case. Pry the two bearing plates apart, and follow the soldering instructions in step 4 of the traditional locket to join the bearing plates to the domed disks. | |
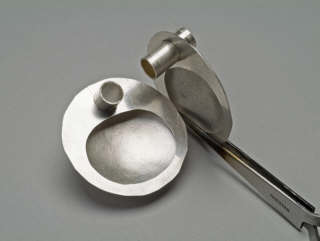
| Install the tube bail. Cut two 25mm (63/64-in.) pieces of 9.5mm inside diameter (ID) heavy-walled sterling silver tubing. Use the 9mm holes on the bearing plates as a guide to saw holes in the domes of each locket case. The holes must hold the tubing perpendicular to the locket case. Use an 8mm cylinder bur to enlarge and adjust the angle of the holes in both the dome and the bearing plate of each locket case. Work slowly, and check for fit repeatedly until the holes are just barely large enough to force the tubing through. Solder the tubing in place with medium solder. Use a saw to remove extra tubing from both sides of each locket case. File and sand the tubing edges clean and flush. | |
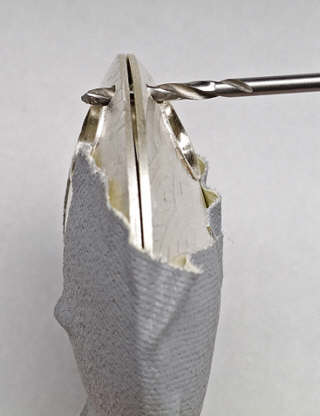
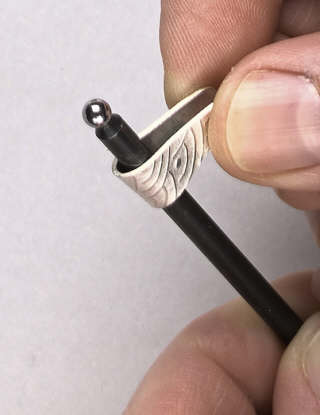
| Install the slide rivet. Tape the locket-case pieces together, and run a dowel through the tube bail to support the locket, if desired. Drill a 2mm (5/64-in.) hole above the tube bail through both locket-case pieces. Clamp a 10mm (3/8-in.) piece of 12-gauge (2.1mm) sterling silver wire in a bench vise, and flare one end of the wire with a cross-peen hammer. | |
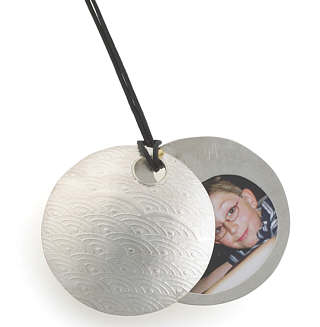
| Insert the wire into the 2mm hole, and trim the extra wire with wire cutters. Hold the locket at an angle on a bench anvil to avoid scarring the locket case, and use a cross-peen hammer to set the rivet. Complete the finishing. File and sand the locket case edges smooth and flush. The locket is complete, and can be patinated or polished. |
Fabricate a Cold-Connection Bail
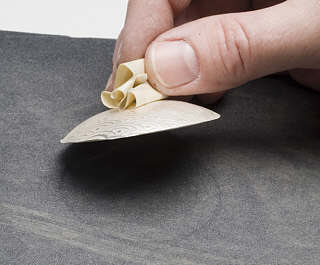
| Cut a 25 x 8mm (1 x 5/16-in.) strip of 20-gauge (0.8mm) sterling silver sheet. Use your fingers to fold the strip in half over a 4mm (5/32-in.) steel rod or the shaft of a small dapping punch. | |
| File the folded strip to taper to 4mm (5/32 in.) at the open end, creating the bail. Sand and finish the bail edges. Use a 0.8mm ball bur to make a dimple an equal distance from all edges at the 4mm (5/32-in.) end of the bail. | |
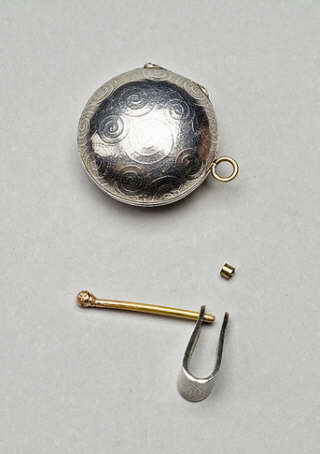
| Use the dimple as a guide while you drill through both ends. Cut a 2mm (5/64-in.) piece of 1.0mm ID tubing, and sand the ends smooth. Ball up one end of a 15mm (19/32-in.) piece of 18-gauge (1.0mm) sterling silver or gold wire. Pickle and clean it. | |
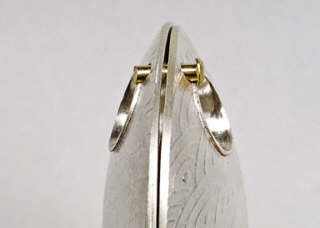
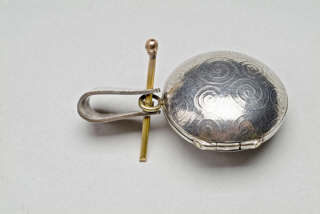
| To install the bail, slide the wire through the front hole of the bail. Slide the tubing on the wire, place the bail loop over the tubing, and then slide the wire through the back hole in the bail. | |
| Trim the wire to protrude 1mm (1/32 in.) beyond the back of the bail. Carefully balance the balled end of the wire on your bench anvil, and form a rivet head on the other end of the wire with a cross-peen hammer. Use a cup bur to clean and form the balled wire end into a sphere. |
Prepare Photos for Locket Use
Lockets can safely hold images of loved ones, but to make sure they fit and don't get ruined, use these easy guidelines.
- Never cut up the only copy of a prized picture. Have copies made, or have them scanned at a copy center.
- Use photo-processing software to manipulate a digital image, making it just the right size for your locket.
- Use a high-quality photocopier at an office-services store to reduce the image, then cut the photocopy to fit.
- Use wide, clear cellophane tape to laminate the image on both sides. Rub the tape with a burnisher, and trim the edges to fit.

You assume all responsibility and risk for the use of the safety resources available on or through this web page. The International Gem Society LLC does not assume any liability for the materials, information and opinions provided on, or available through, this web page. No advice or information provided by this website shall create any warranty. Reliance on such advice, information or the content of this web page is solely at your own risk, including without limitation any safety guidelines, resources or precautions, or any other information related to safety that may be available on or through this web page. The International Gem Society LLC disclaims any liability for injury, death or damages resulting from the use thereof.
Related Articles
Learning Metalwork from Shumei Tanaka
CAD/CAM: Passion and Innovation
Making a 950 Palladium Signet Ring
Working with Jewelry Hinges Made Easy


The All-In-One Jewelry Making Solution At Your Fingertips
When you join the Ganoksin community, you get the tools you need to take your work to the next level.

Trusted Jewelry Making Information & Techniques
Sign up to receive the latest articles, techniques, and inspirations with our free newsletter.