Welding Technology Tool Modifications Part 2
Custom jewelry projects for tack-, fusion-, and pulse-arc-welding sometimes call for special welding tool lead attachments. Bench jewelers often make the required leads using standard bench tools to better hold parts for pre-assembly and welding. Here are a few tack-, fusion-, and pulse-arc-welding tool making basics you may find helpful.Use your imagination to create and make new tool leads that will accommodate your repair and custom order work. The electrical supplies for these projects are all standard and were purchased at electrical supply and/or hardware stores.
3 Minute Read

Custom jewelry projects for tack-, fusion-, and pulse-arc-welding sometimes call for special welding tool lead attachments. Bench jewelers often make the required leads using standard bench tools to better hold parts for pre-assembly and welding.
Here are a few tack-, fusion-, and pulse-arc-welding tool making basics you may find helpful:
Welding Technology Tool Modifications for Tack-, Fusion- and Pulse-Arc- | |
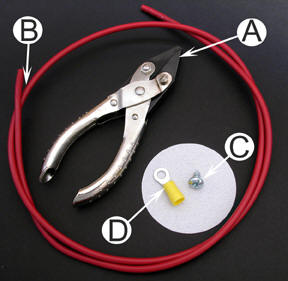
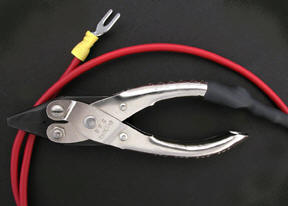
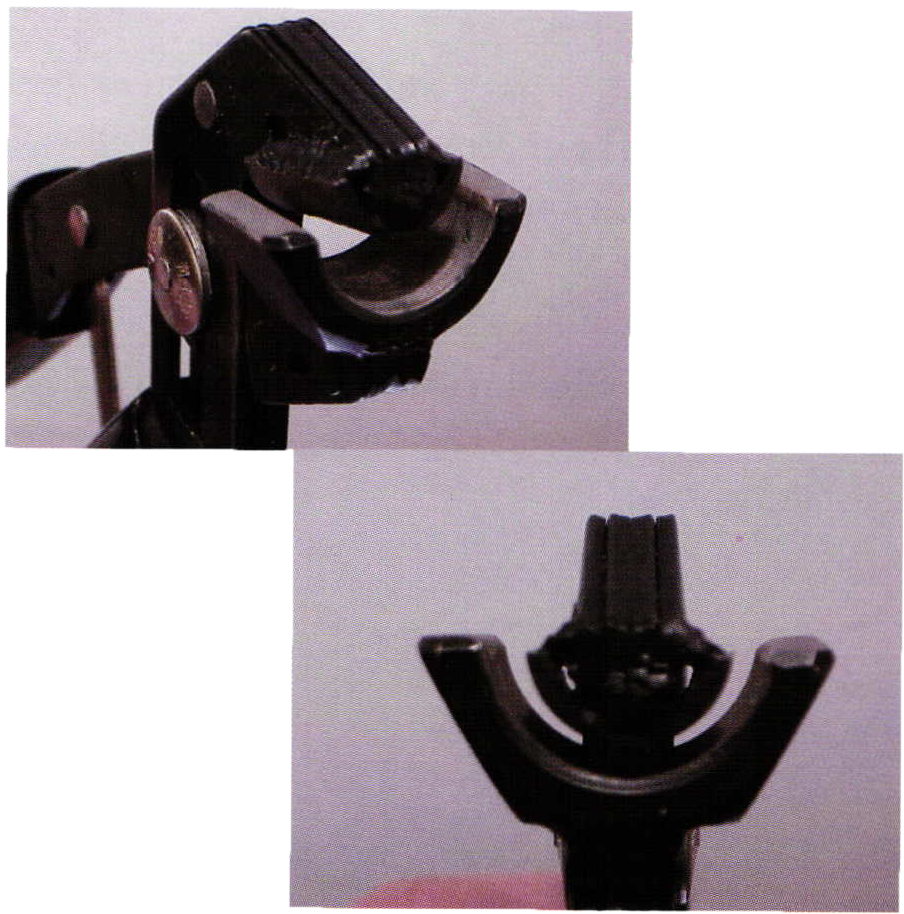
| For holding wires and other parts more securely, Mike Warren of Warren Jewelers devised making a lead using parallel pliers. The materials used to make this lead are: (A) Chain nose parallel pliers, (B) 12 gauge hookup wire, (C) Sheet metal screw and (D) 10 to 12 gauge ring tongue. | |
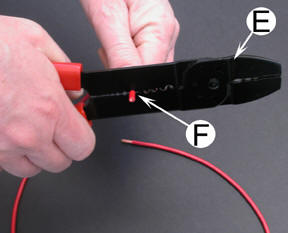
| Using an electrical wire tool, strip about 6mm from each end of the hookup wire (F) and solder the strands of copper wire using lead solder. | |
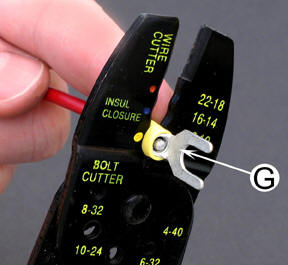
| Using the same electrical wire tool, secure the ring and spade terminals (G) on each end of the wire. | |
| Drill a hole (H) where the ring tongue will be secured. | |
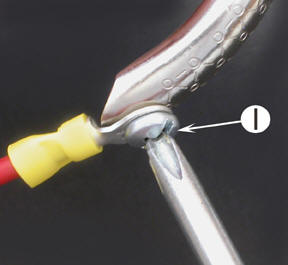
| Secure the ring tongue to the handle of the parallel pliers using a sheet metal screw (I). | |
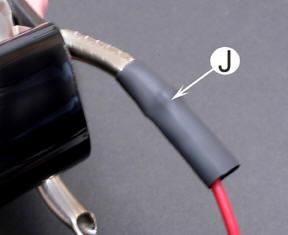
| Next, place a length of heat shrinking tubing (J) to cover and insulate the assembly. Using a standard hair dryer, shrink the tubing over the assembly. When heated, the tubing conforms to the shape of the assembly. | |
| The new pliers lead is finished and ready for use. You can use a diamond wheel to create small indentations in the pliers jaws for holding wire. You may also choose to solder silver or platinum inserts to the pliers jaws to prevent marking or contamination. | |
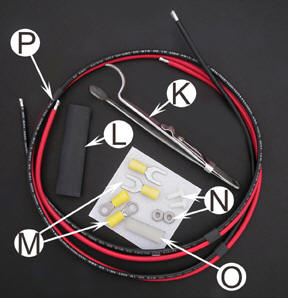
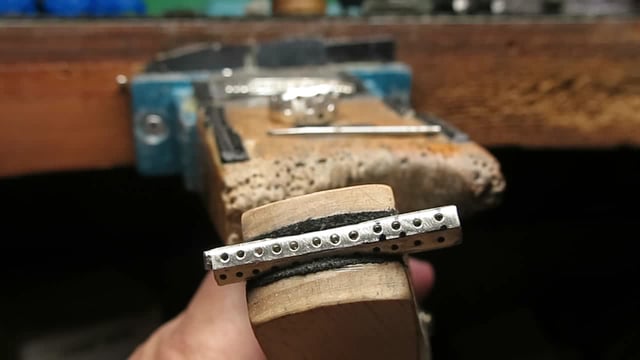
| Using head and shank tweezers for tack-welding of settings to shanks simplifies the process of soldering. Here are the steps for making a double pole lead for head and shank tweezers. The materials used are: (K) standard head and shank tweezers, (L) heat shrinking tubing, (M) 10 to 12 gauge spade and ring terminals, (N) nylon screws and metal nuts, (O) nylon spacer (a nonconductive dielectric material), (P) 12 gauge hookup wire. Note the wire ends have been striped and lead soldered. | |
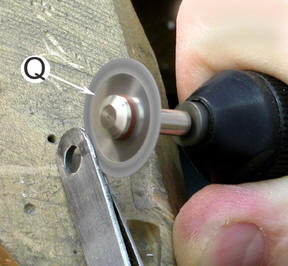
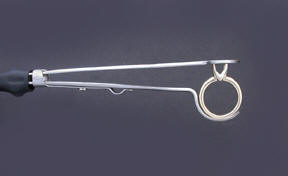
| Dissemble the head and shank tweezers by using a diamond wheel (Q) and cut them apart where they were originally assembled. The thickness of the diamond wheel is 0.17mm so only a very minimal amount of the tweezers thickness is lost during the process. | |
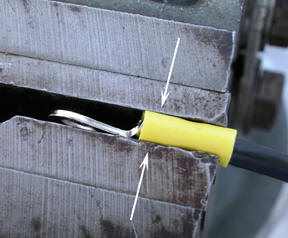
| To secure the wires, insert them into the ring terminals and then into the vice. Pressure from the vice flattens the end of the tongue while securing the wires. | |
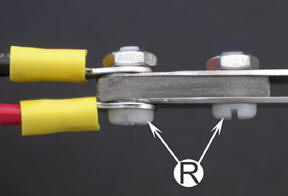
| With the tongues in place, assemble the head and shank tweezers using the nylon screws (R). Nylon screws (or another non-conductive material) are essential because this lead is double pole. | |
| With a positive and negative lead to the double pole head and shank tweezers, holding and tack-welding settings to shanks becomes more efficient. For soldering, the tacked setting and shank are held in cross-locking tweezers and no other holding devices are required. You may choose to install silver or platinum inserts to help prevent marking and possible contamination. | |
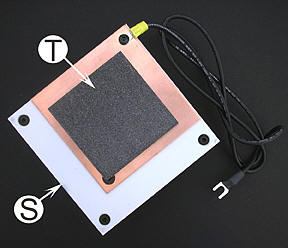
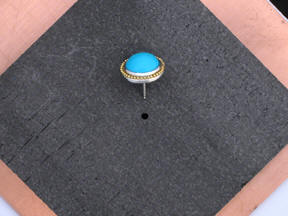
| This photograph features the contact pad (S) for tack-, fusion-, and pulse-arc-welding. When new, the included graphite overlay (T) has a rough texture that can leave a "foot-print" on the back of your work when used. | |
| Use a rough sanding board and flatten the surface. You can also drill a hole through the graphite and contact pads to accommodate ear posts. | |


Use your imagination to create and make new tool leads that will accommodate your repair and custom order work. The electrical supplies for these projects are all standard and were purchased at electrical supply and/or hardware stores.
Find more Tool Modifications for Tack-, Fusion- and Pulse-arc-Welding Technology here.
You assume all responsibility and risk for the use of the safety resources available on or through this web page. The International Gem Society LLC does not assume any liability for the materials, information and opinions provided on, or available through, this web page. No advice or information provided by this website shall create any warranty. Reliance on such advice, information or the content of this web page is solely at your own risk, including without limitation any safety guidelines, resources or precautions, or any other information related to safety that may be available on or through this web page. The International Gem Society LLC disclaims any liability for injury, death or damages resulting from the use thereof.
Related Articles
Jewelry Designs: Titan Pendant
“Moving a Hole”
Customized Robo Grip Pliers
Pulse-Arc-Welder: Sterling Silver Bracelet


The All-In-One Jewelry Making Solution At Your Fingertips
When you join the Ganoksin community, you get the tools you need to take your work to the next level.

Trusted Jewelry Making Information & Techniques
Sign up to receive the latest articles, techniques, and inspirations with our free newsletter.