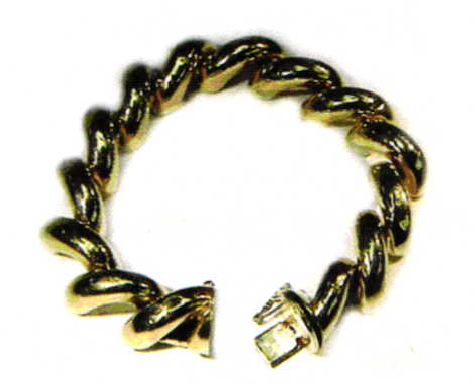
Macaroni Bracelet Repair
2 Minute Read
Last time a customer brought a San Marco bracelet to you for repair, what did you do with it? Commonly know as the "macaroni" bracelet, this repair can be a challenge for many repair jewelers. Many jewelry repair technicians simply solder the links back together, creating a joint that is stiff. Few can repair the broken link with a flexible joint as the end result. This can be a time consuming job.
I would like to suggest a repair that results in a flexible joint, that is less tedious, and that can be performed in a matter of minutes.
After a quick examination of the bracelet, we notice that the ball joint of one of the links has worn out a hole that is too large to keep the hinge ball inside the corresponding link. Here in the South they say, "it wallowed it out."
This is a common problem for this style of bracelet, especially for those customers who "hardly ever wear it." Translated: I never take it off!
Regardless of the wearing habits of your customer, this is a repair that can be done.
It is not unusual for a bracelet like this to have a worn out hinge pin/ball that has to be remade. That is not the case in this repair. The problem here is that the hole in the ad joining link has become larger from wear and needs to be made smaller. Not a problem-except that the ball joint must be put inside the link prior to making the hole smaller. This sort of reminds me of putting a ship into a bottle.
Take a piece of fourteen karat 22 gauge round wire and make a small circle or "o-ring" on one end.
Cut off the excess wire and wrap the o-ring around the wire connected to the ball joint. The fit should be snug but not so tight that the o-ring will not rotate around the hinge ball joint wire.
Reinsert the ball of the hinge back into the overly large hole of the ad joining link and check the fit to see that the o-ring will cover the overly large hole.
Laser weld the o-ring to the link where the hole was too large, taking care not to weld the ball joint wire to the o-ring. Blend when you have the o-ring joint seam completed. Finish out and polish.
Repairing the San Marco bracelet using this technique exhibits a level of skill and crafts manship that the jeweler down the street probably won't be able to match-unless he/she has a laser and reads BENCH Magazine!
HELPFUL HINT
Whenever you are called upon to repair a broken item, especially one that is symmetrical or has a repetitive pattern. it is a good idea to take a photo of the broken piece or, better yet, photocopy the piece using the "actual size" setting of your copier or scanner. File it away with the customer's envelope. This will come in handy if the piece breaks again and your customer is concerned that the repair is in the "same place as before."
You assume all responsibility and risk for the use of the safety resources available on or through this web page. The International Gem Society LLC does not assume any liability for the materials, information and opinions provided on, or available through, this web page. No advice or information provided by this website shall create any warranty. Reliance on such advice, information or the content of this web page is solely at your own risk, including without limitation any safety guidelines, resources or precautions, or any other information related to safety that may be available on or through this web page. The International Gem Society LLC disclaims any liability for injury, death or damages resulting from the use thereof.
The All-In-One Jewelry Making Solution At Your Fingertips
When you join the Ganoksin community, you get the tools you need to take your work to the next level.
Trusted Jewelry Making Information & Techniques
Sign up to receive the latest articles, techniques, and inspirations with our free newsletter.
