Making a Cloisonne Pendant Using Torch Fire
2 Minute Read
Cloisonné is a French word that means 'to be confined,' 'to be cloistered.' Traditionally, the cloisonné technique consists in making the contour of a picture by fixing very fine metallic threads on the piece and in filling the resultant spaces (cloisons) in with enamel.
The inspiration for the picture was provided by the painting "Profile of a Young Woman," by the Renaissance Italian painter Sandro Botticelli (circa 1480).
Making a Cloisonne Pendant Using Torch Fire
Step 1
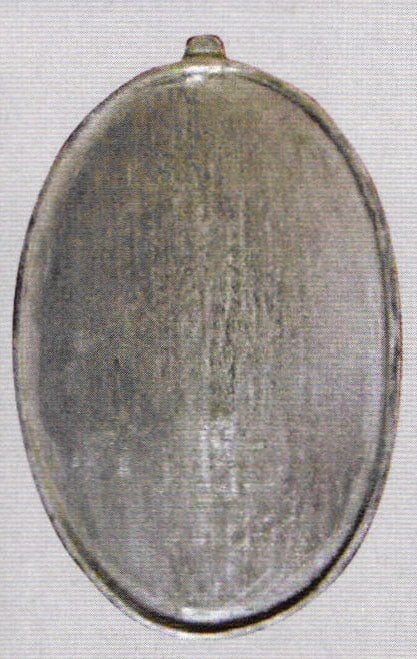
For this project, make an oval pendant measuring 7.0 cm high and 4.5 cm width using a 950 silver sheet 1.5 mm thick. The frame for the protection of the enamel consists of a 1.0 mm square section string soldered on the silver sheet using a very hard solder (SEE PICTURE l).
Step 2
Prepare a 1000 silver flat wire 0.20 mm thick measuring 0.70 mm width (1000 silver is more pliable and it does not oxidize).
Step 3
| Pic 2 | Pic 3 |
Apply a thin layer of colorless enamel (flux) to the piece and fire it using a torch. (SEE PICTURES 2 and 3).
Step 4
Shape the wire which was divided into different parts at the top of the figure and place them on top of the enameled piece. You may drop a little bit of quick dry glue so the wires do not move, the glue evaporates in the heat. (SEE PICTURE 4).
Step 5
| Pic 5 | Pic 6 |
Gradually develop the picture by firing it step by step which facilitates the assembly. It is not necessary to solder the wires because the colorless enamel fixes the wires to the piece when it melts (SEE PICTURES 5 and 6).
Step 6
| Pic 7 | Pic 8 |
Choose the colors when the wire outline is ready and begin to apply the wet enamel using a number 00 paintbrush (SEE PICTURES 7 and 8).
Step 7
Step 8
Fire it using the torch with the hard flame. First let the fire be large by closing almost entirely the air holes to guarantee the dryness (if there is a little humidity the water will boil and cause all the enamel to spill out from the piece ). After, open the air entrance to increase the heat (SEE PICTURE 10).
Step 9
| Pic 11 | Let the piece cool and repeat the process once or twice until the enamel is level with the frame of the pendant. (SEE PICTURE 11). |
Step 10
Make the finish by using a diamond point, sandpapers numbers 280, 400 and 600 and wash the piece very well under running water and using a soft toothbrush. Fire it again for the enameled surface to reacquire its shine.
Step 11
| Finally, solder a flared bail using easy solder, put it in the acid to clear the silver and polish (SEE PICTURE 12). |
You assume all responsibility and risk for the use of the safety resources available on or through this web page. The International Gem Society LLC does not assume any liability for the materials, information and opinions provided on, or available through, this web page. No advice or information provided by this website shall create any warranty. Reliance on such advice, information or the content of this web page is solely at your own risk, including without limitation any safety guidelines, resources or precautions, or any other information related to safety that may be available on or through this web page. The International Gem Society LLC disclaims any liability for injury, death or damages resulting from the use thereof.
The All-In-One Jewelry Making Solution At Your Fingertips
When you join the Ganoksin community, you get the tools you need to take your work to the next level.
Trusted Jewelry Making Information & Techniques
Sign up to receive the latest articles, techniques, and inspirations with our free newsletter.
