How to Mount Objects in Metal Frames


3 Minute Read

By Helen I. DriggsMore from this author

For the illusion of "floating objects" Helen I. Driggs shares her technique, a step by step guide, on how to mount objects in matel frames.

********************

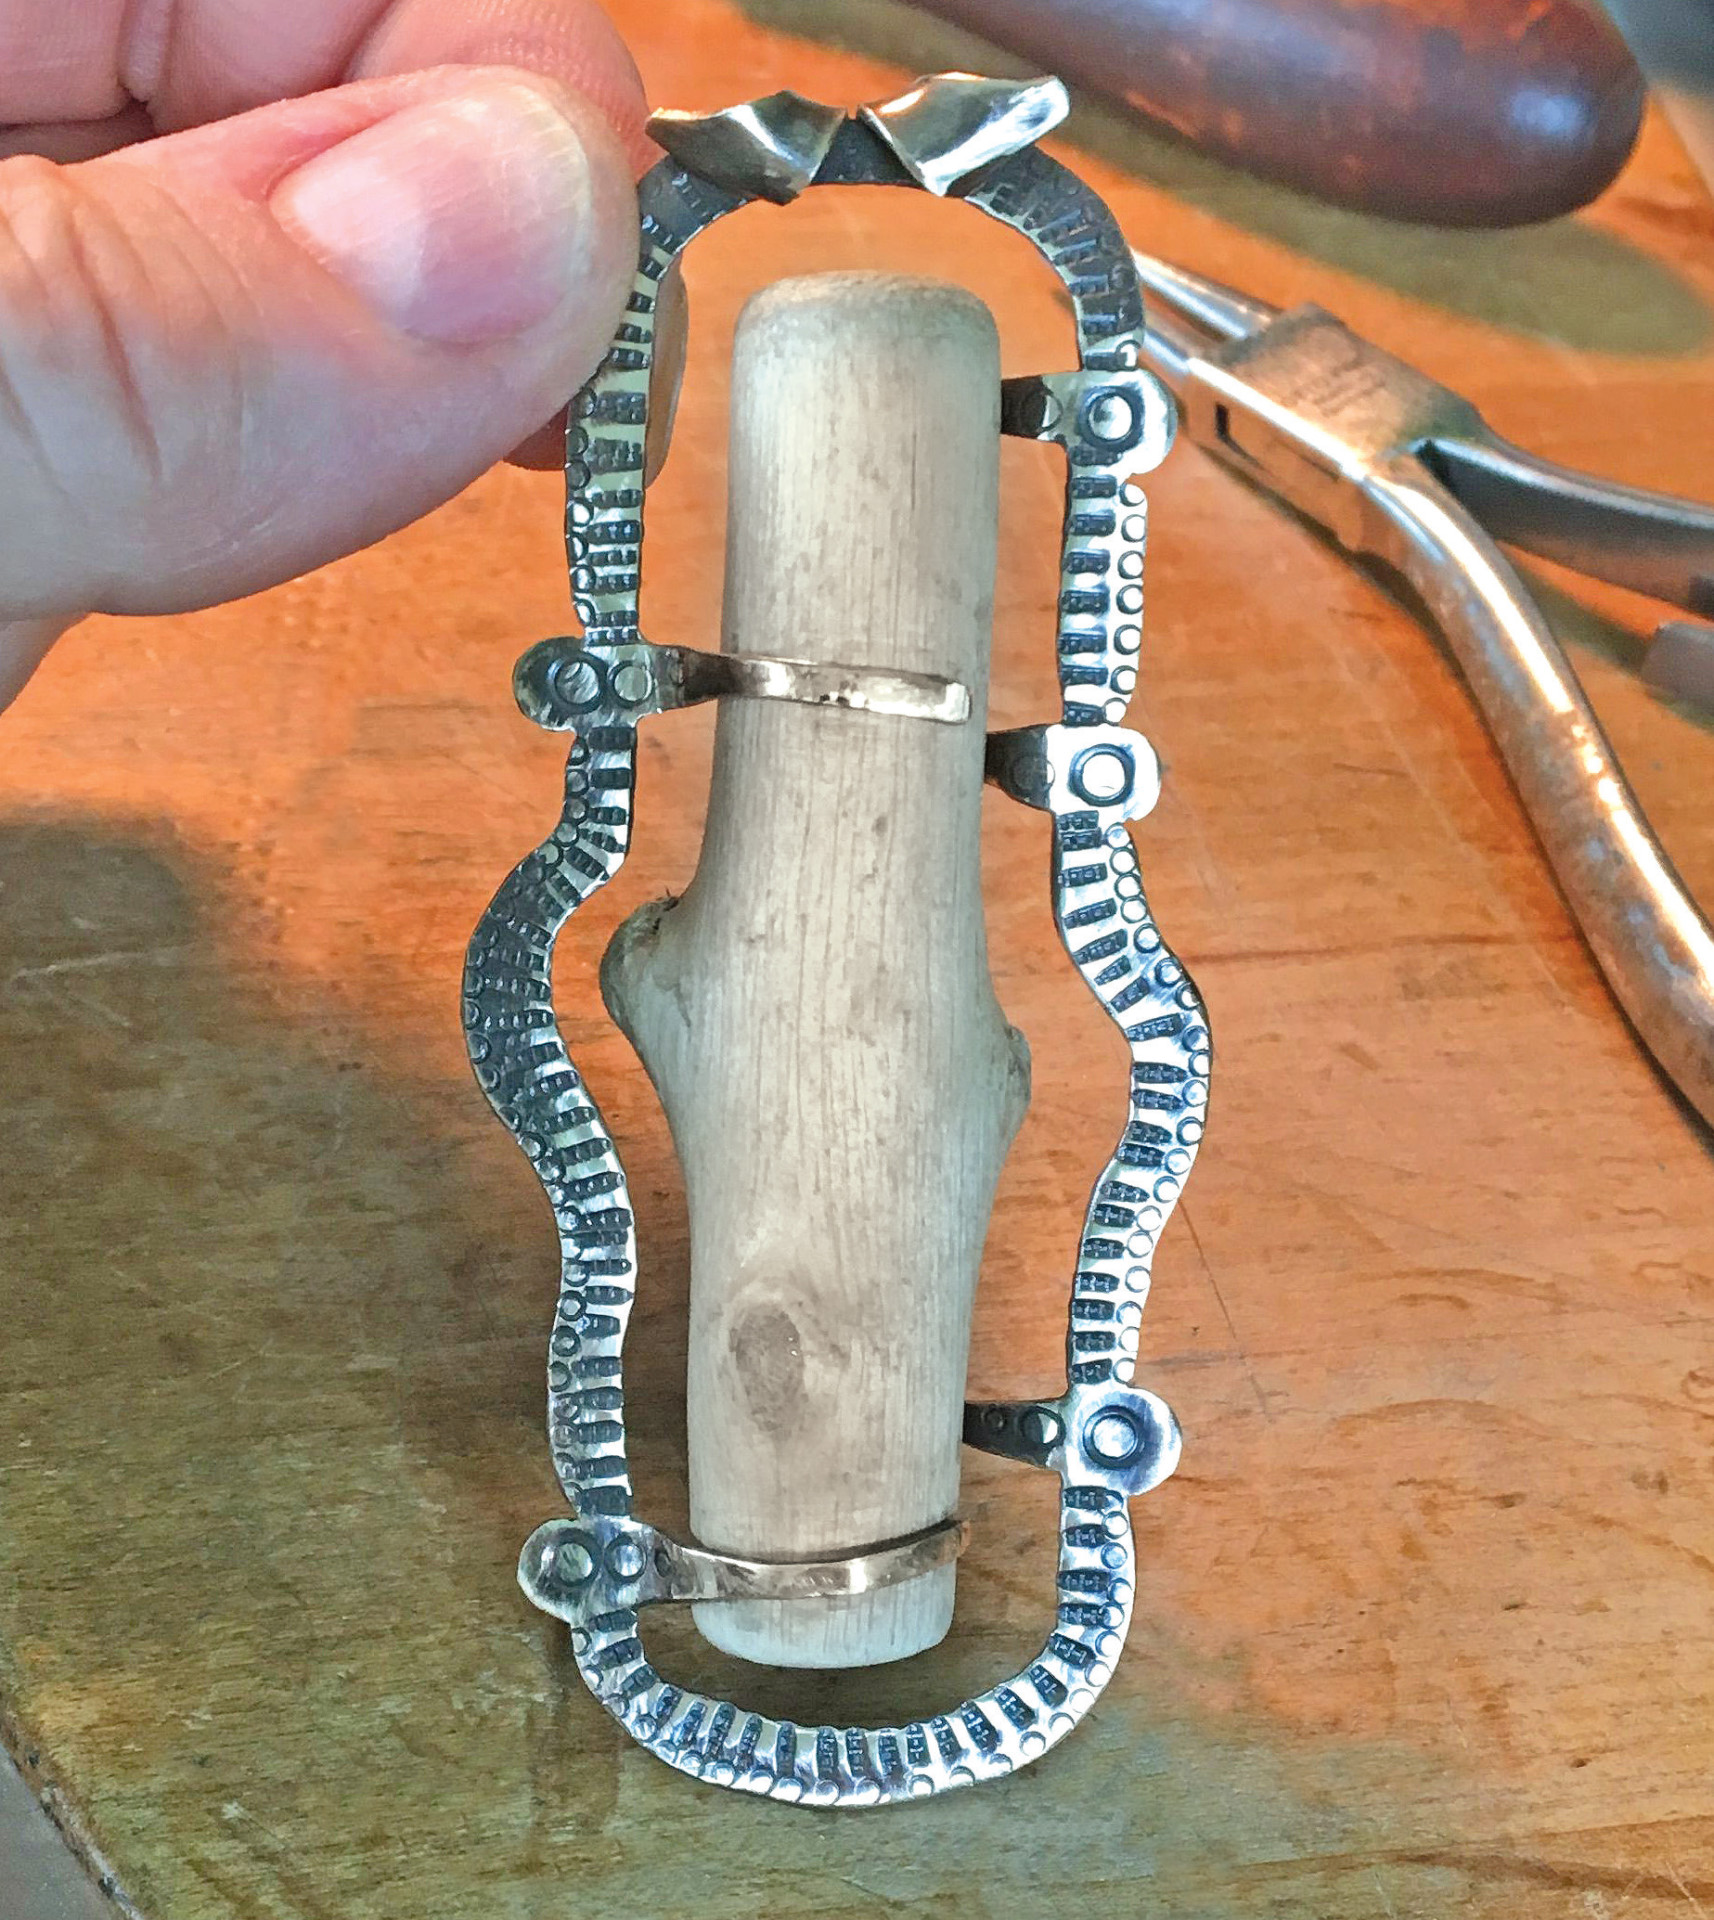
Bi-directional tabs are a decorative way to secure delicate objects that have very pronounced curves or are thick, round, or otherwise a challenge to mount securely on sheet metal. I like to create extra long decorative tabs with my saw that will encircle the object much like a strap. Once the tabs have been burnished and work hardened, any thick or barrel shaped object, such as a branch, tube, shell, pebble, or stone, can be securely mounted and appears to float within the frame. This is a good skill to have as more consumers are seeking customized jewelry that incorporates materials that hold significance to them.

For this project, you will need 20 gauge metal (I used jeweler's bronze), a permanent marker, a millimeter gauge, steel block, metal stamps, round forming pliers, a jeweler's saw, a curved burnisher, and abrasive papers.

Carefully trace the outline of the object you intend to frame as closely as possible onto the sheet metal.
Indicate a centerline by either measuring it or eyeballing it. It does not need to be exact, just visually centered. Next, determine where the extended tabs should be positioned based on the contours of your specific object. Be careful to avoid bumps or bulges, as the tabs must be compressed tightly around the object to secure it. Make sure the tabs are at least as long as the object's radius (half the diameter). When in doubt, err on the side of longer. Indicate a second line about 2 mm outside of the object outline (not shown)—this will serve as your sawing line.
The idea is to create an opening that is even with the contour of the object to be mounted. I always draw directional arrows next to the indicated tabs to remind me which direction they will ultimately be positioned in as I am sawing. I prefer using an odd number of tabs, but that choice is yours.
Saw out the inner opening, being careful to not nick the bases of the tabs. Leave plenty of metal, as it can be removed later if required.
Check the fit by inserting the object into the sawn opening and making sure it matches the perimeter of the object and is even all the way around. Sand and clean up the metal edges with abrasive paper or flex-shaft attachments and needle files, aiming for consistently shaped tabs.
Decide on a bail shape and final frame width or shape. Add those outlines to the metal. At this point, you can either texture first and then saw (my preference), or saw first and then texture. There is no rule here, use your own judgment on the final design. I chose to use a surface texture on the metal because the soft driftwood branch I used has a very smooth and delicate surface. I textured the bronze with a chasing punch and some metal stamps. I did not texture the back of the sheet; however, this can be done as well if you choose to.
Using flat nose pliers, gently bend the tabs out of the opening, taking care not to mar the metal. Remember that the tabs must capture the object from both the front and back so bend accordingly.
Use round forming pliers to coax the tabs into a curved shape that matches the contours of the object. The metal will begin to work harden as you form it, so take care and be decisive as you move the tabs. You can anneal if you overwork the metal, but I prefer not to, especially with softer metals.
Verify the fit of the object and the security of the tabs. The bail I made is split in the center, so I rolled it down at this point as well.
If you choose to patinate the metal, sand, clean, finish, and burnish it at this point, and then patina to avoid damage to the object.
The final step is to carefully burnish the tabs against the object with a highly polished curved burnisher, taking care not to disrupt the patina. This mounting method is very versatile and has endless possibilities for securely mounting any thick, freeform object.

In association with

The award-winning Journal is published monthly by MJSA, the trade association for professional jewelry makers, designers, and related suppliers. It offers design ideas, fabrication and production techniques, bench tips, business and marketing insights, and trend and technology updates—the information crucial for business success. “More than other publications, MJSA Journal is oriented toward people like me: those trying to earn a living by designing and making jewelry,” says Jim Binnion of James Binnion Metal Arts.

Click here to read our latest articles
Click here to get a FREE four-month trial subscription.

You assume all responsibility and risk for the use of the safety resources available on or through this web page. The International Gem Society LLC does not assume any liability for the materials, information and opinions provided on, or available through, this web page. No advice or information provided by this website shall create any warranty. Reliance on such advice, information or the content of this web page is solely at your own risk, including without limitation any safety guidelines, resources or precautions, or any other information related to safety that may be available on or through this web page. The International Gem Society LLC disclaims any liability for injury, death or damages resulting from the use thereof.


Helen I. Driggs

The All-In-One Jewelry Making Solution At Your Fingertips

When you join the Ganoksin community, you get the tools you need to take your work to the next level.

Become a Member

Trusted Jewelry Making Information & Techniques

Sign up to receive the latest articles, techniques, and inspirations with our free newsletter.