Reticulation Technique and Procedure
Reticulation produces lovely textured surfaces that appear very 'natural' and can be controlled to produce specific patterns with practice. Used extensively by craft and art jewelers in the 1960's and early 70's in North America it lost fashionability in the 80's. It provides textured sheet metal that can be used as a component part of an object.
4 Minute Read
Reticulation technique and procedure produces lovely textured surfaces that appear very 'natural' and can be controlled to produce specific patterns with practice. Used extensively by craft and art jewelers in the 1960's and early 70's in North America it lost fashionability in the 80's. It provides textured sheet metal that can be used as a component part of an object.
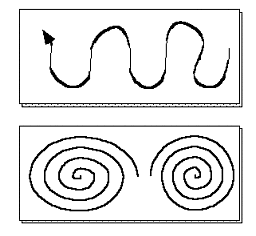
You can fuse a surface to get texture but this is not true reticulation and is termed 'vermiculation'. True reticulation works best when you have a lower melting core and higher melting exterior, then you heat it to the point that the core starts to be mobile and the pressure of the torch flame (I like to glance it at about 30-45 degrees angle to the surface) across the surface which causes the exterior shell to buckle and move, just like the mountains on the earth, paint drying in a can, the skin on burnt milk in a pan. It can be very well controlled, really amazing conscious patterns are available if you practice a lot. Torch type, angle to surface, distance from surface, temperature, movement pattern, movement speed all have a bearing on your results.
You have to be careful about heating the top exterior to the point that it alloys with the core-then things smooth out where this has occurred. Usually such alloying through happens if you hold the torch flame still too long. In general keep your flame moving at all times.
Resists
It is possible to use resists to the reticulation-that is to have areas that do not reticulate thus providing you with pattern development options. You can use white-out, paint it onto the surface and then heat to reticulate. Where the white out is stays smooth-everywhere else reticulates. (if you use solvent based white out then let it dry for 15 minutes or so to evaporate all traces of the solvent before heating it) Another way of resisting the reticulation in specific places for pattern development is that one can place smooth pieces of steel under the spots you want the surface to be smooth, they act like heat sinks and prevent the reticulation where they are in contact with the sheet.
Forming
Reticulation silver is rather brittle and does not like to be formed after you have reticulated it-so you need to do most forming first. If you are reticulating a three dimensional object that you have formed already then back it with casting investment so it does not collapse when you are reticulating it, the heat sink and refractive nature of the investment also helps prevent your burning through. A note on soldering reticulation silver, it solders fine where you have just filed or scraped a seam but soldering onto the surface can be problematic and solder spills tend to lump up on it so make sure your seams are tight and clean and well fluxed and if possible solder your reticulation sheet into frames or onto your jewelry piece from behind so as to hide any potential spills.
Materials
Best to use is 800.200 silver, commonly sold as coin silver at your local coin shop-just roll out your coin to .5 or .8mm or even 1 mm, heat and pickle the sheet to prepare your surface and begin to reticulate. You can also alloy your own reticulation alloy: 8 parts Ag, 2 parts Cu, melt the copper first, as always use a reducing flame, roll your metal out into foil that you coil up to reduce the melting time required and preheat your crucible a long long time so you don't waste time heating the crucible when you should be melting. Some gold alloys work and brass too can be reticulated.
Count on practicing-learn on the silver first and then try it on the gold. In silver you depletion silver the sheet for a while 5-8 times heating and pickling until the surface shows dead white while heating and before pickling. This creates the external higher melting 'shell'. I brass brush the surface with soapy water and rinse well in between all heating and pickling steps. Use a clean, flat, smooth brick or charcoal underneath your sheet. Keep the flame moving and experiment with position, angle and movement to learn control.
For gold you will need to heat and pickle as well to create the different melting temperature shell but I think you will find your results are never as lovely as with reticulation silver. You can also reticulate brass with practice and a friend of mine (Judith Speelman) does this with a mini-torch and leaves portions of the sheet smooth to better contrast with the textured areas.
This brings me to my advice for obtaining reticulated gold surfaces: practice first with silver reticulation alloy, count on only some portions of the sheet being good, then when you do get a particularly lovely area or reticulation saw it out, rubber mold it, inject wax and then cast your 14k into that shape. You just got a repeatable component too by doing this.
You assume all responsibility and risk for the use of the safety resources available on or through this web page. The International Gem Society LLC does not assume any liability for the materials, information and opinions provided on, or available through, this web page. No advice or information provided by this website shall create any warranty. Reliance on such advice, information or the content of this web page is solely at your own risk, including without limitation any safety guidelines, resources or precautions, or any other information related to safety that may be available on or through this web page. The International Gem Society LLC disclaims any liability for injury, death or damages resulting from the use thereof.
Charles Lewton-Brain
Master goldsmith Charles Lewton-Brain trained, studied and worked in Germany, Canada and the United States to learn the skills he uses. Charles Lewton-Brain is one of the original creators of Ganoksin.
The All-In-One Jewelry Making Solution At Your Fingertips
When you join the Ganoksin community, you get the tools you need to take your work to the next level.
Trusted Jewelry Making Information & Techniques
Sign up to receive the latest articles, techniques, and inspirations with our free newsletter.


